How to run Jupyter notebook inside docker
Why Jupyter ?
Jupyter Notebook, or Jupyter for short, is an open-source web application that allows you to write and share documents that contain:
- code - Jupyter is famous for its Python support but more than 40 other languages are supported
- equations - using the markdown language and its extensions
- interactive data visualization
Jupyter is even more powerful when you use it inside Docker: as a developer you don’t want to mess up your global environments with unexpected dependencies. Docker makes it easy to keep your machine clean.
I used intensively Jupyter first to gain expertise in Python, but also to visualize the results of data processing algorithms.
Icing on the cake, the setup of Jupyter takes less than 5 mn!
How to test Jupyter in less than 5 minutes
The first step is to have docker installed on your machine, but that’s a no brainer to install.
The second step is to choose a Jupyter docker container image to use.
Docker Image selection
You could build your own container but there are plenty of docker distributions available on the web to choose from.
This page is a good starting point.
minimal jupyter notebook
The jupyter/minimal-notebook is a good starting point to test Jupyter.
To use that container, you use the docker CLI:
docker run -p 8888:8888 jupyter/minimal-notebookat the end of the installation, the image outputs the information to access your notebook:
To access the notebook, open this file in a browser: file:///home/jovyan/.local/share/jupyter/runtime/nbserver-7-open.html Or copy and paste one of these URLs: http://3f4712aeda3b:8888/?token=211e6715bb33..e00688e5a7f100d7d0fcf26 or http://127.0.0.1:8888/?token=211e6715bb33..e00688e5a7f100d7d0fcf26If you open the URL in your browser you are in your notebook!
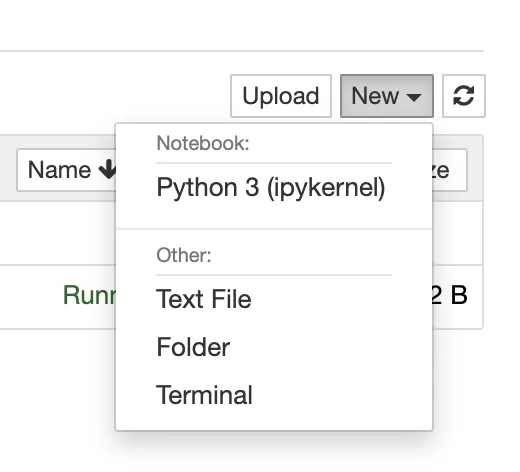
 This version of Juptyer comes only with the Python 3 kernel, and using the
 New menu you can create your first document:
 There are a tons of documentation online that describes the basic navigation inside a Jupyter document, but it is really easy to create your first python document:
 The
The sys.path confirms -if it was really needed- that all the dependencies are contained inside the docker image filesystem.
The interesting part is the first directory (/home/jovyan/work) that will be later used as a mount point so that you can use files on your local disk.
JupyterLab
It takes only a few minutes to get comfortable with the web Jupyter interface and the main gotcha to be aware of is the order of the cells (the value between branckets).
As described here, there is a new interface of Jupyter that is in active development: it is called JupyterLab
This interface is more sophisticated and give an easier access to the internals of the notebook run time environment.
To use Jupyter with that new UI, you simply need to pass an environment variable when you start the image:
docker run -e JUPYTER_ENABLE_LAB=yes -p 8888:8888 jupyter/minimal-notebookThe interface seems radically different at first:
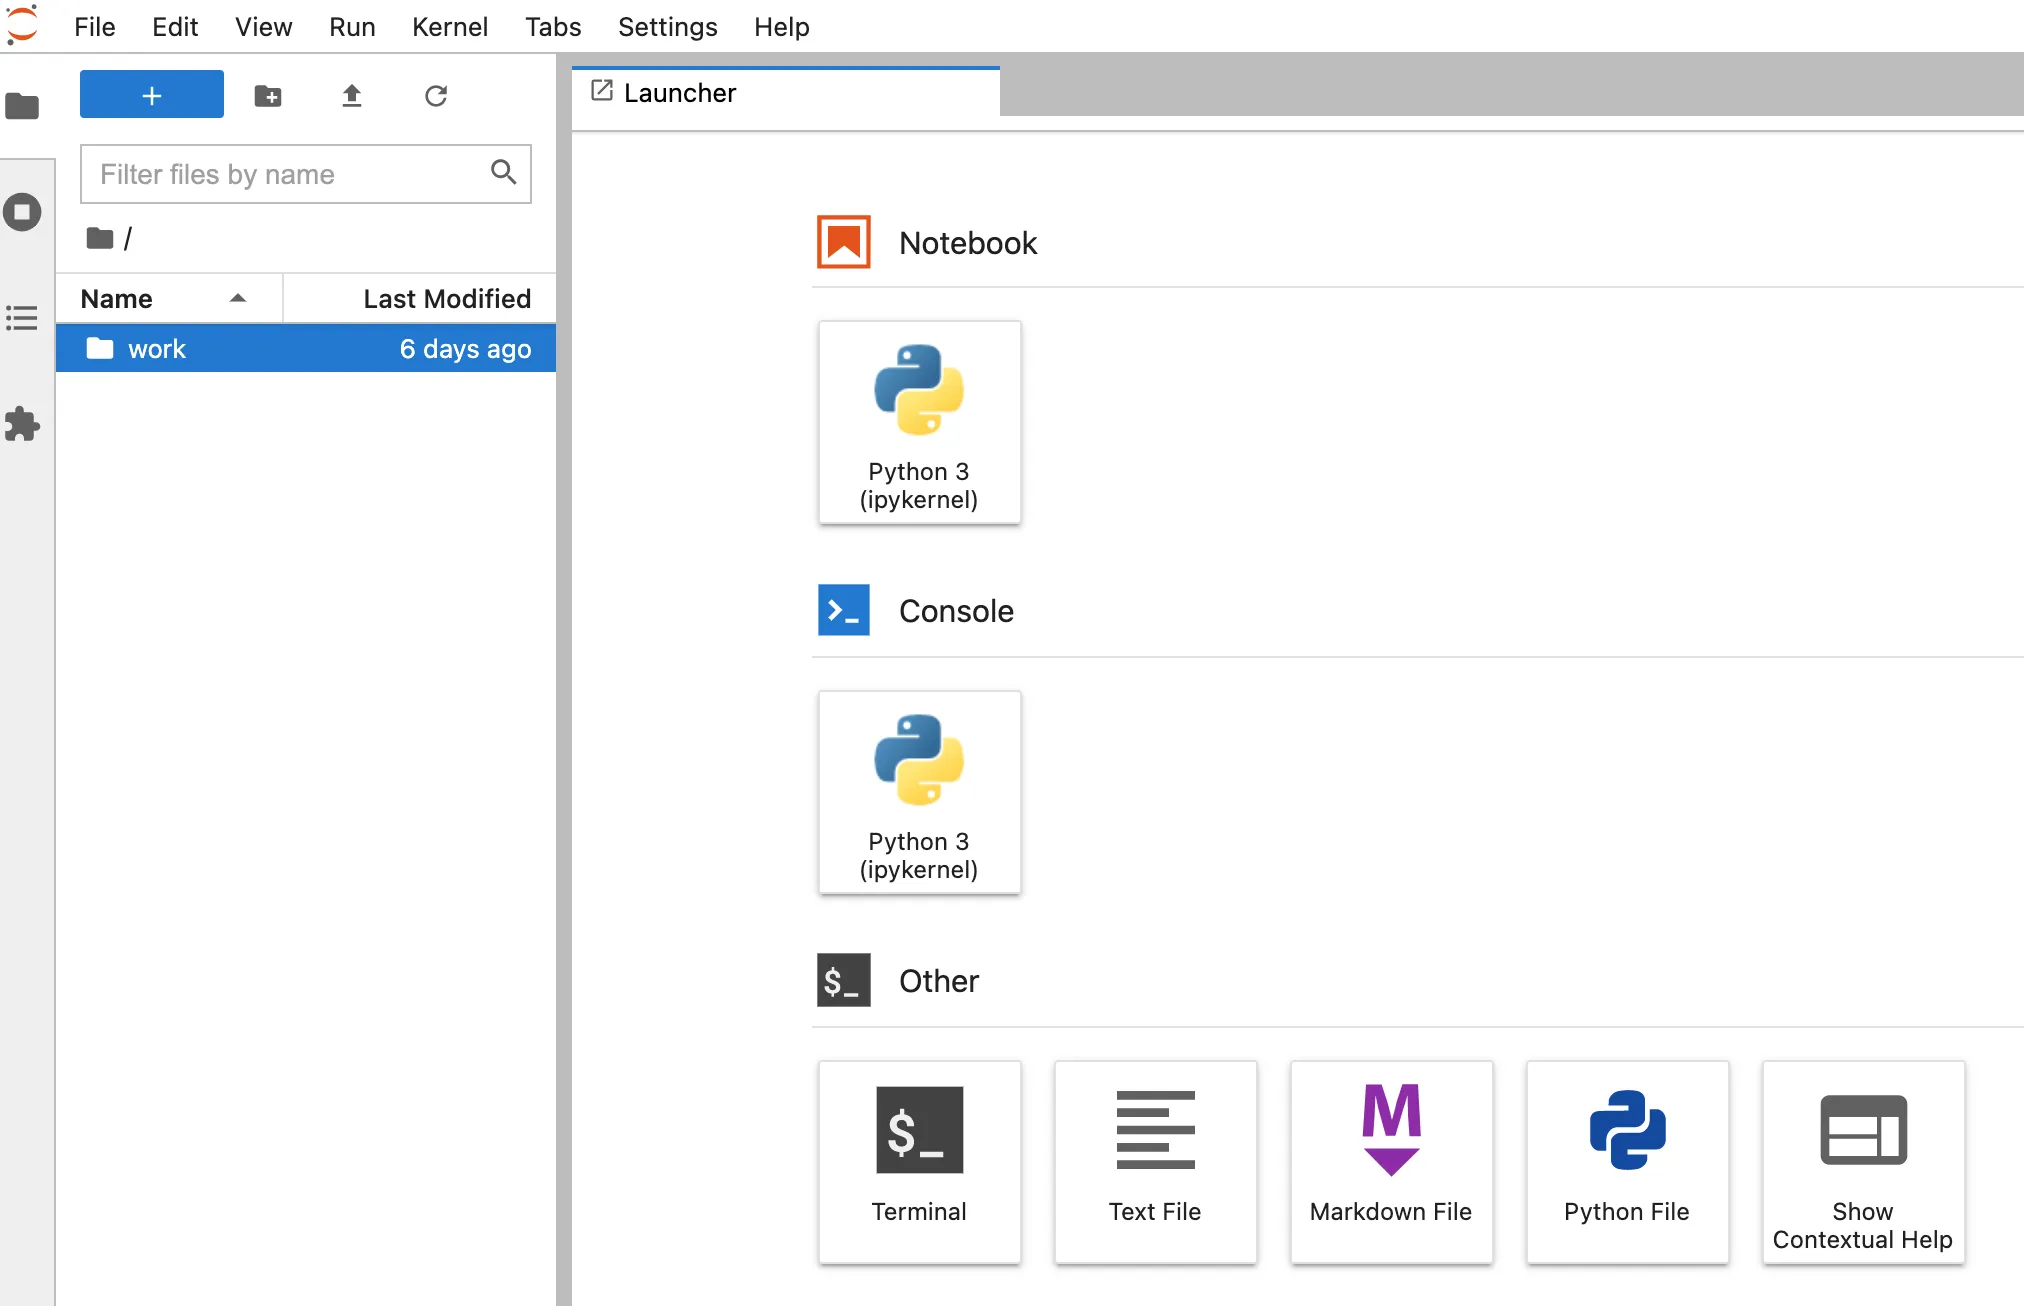 The
The Python 3 (ipykernel) allows you create a python document like before:
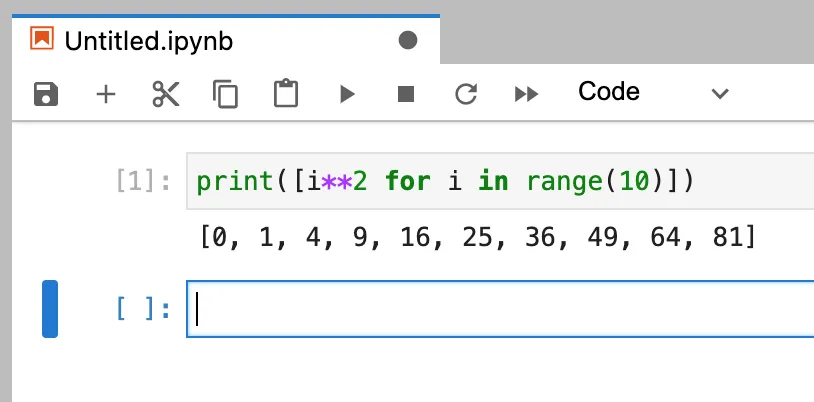 And the
 Terminal document, gives you a shell inside your running docker container:
 I just scratched the surface of what you can do with the new
 JupyterLab. According to the documentation this will become the default interface in the future, so it may be worth jumping on the bandwagon now.
all-spark-notebook
Python is not the only language (aka kernel) available in Jupyter.
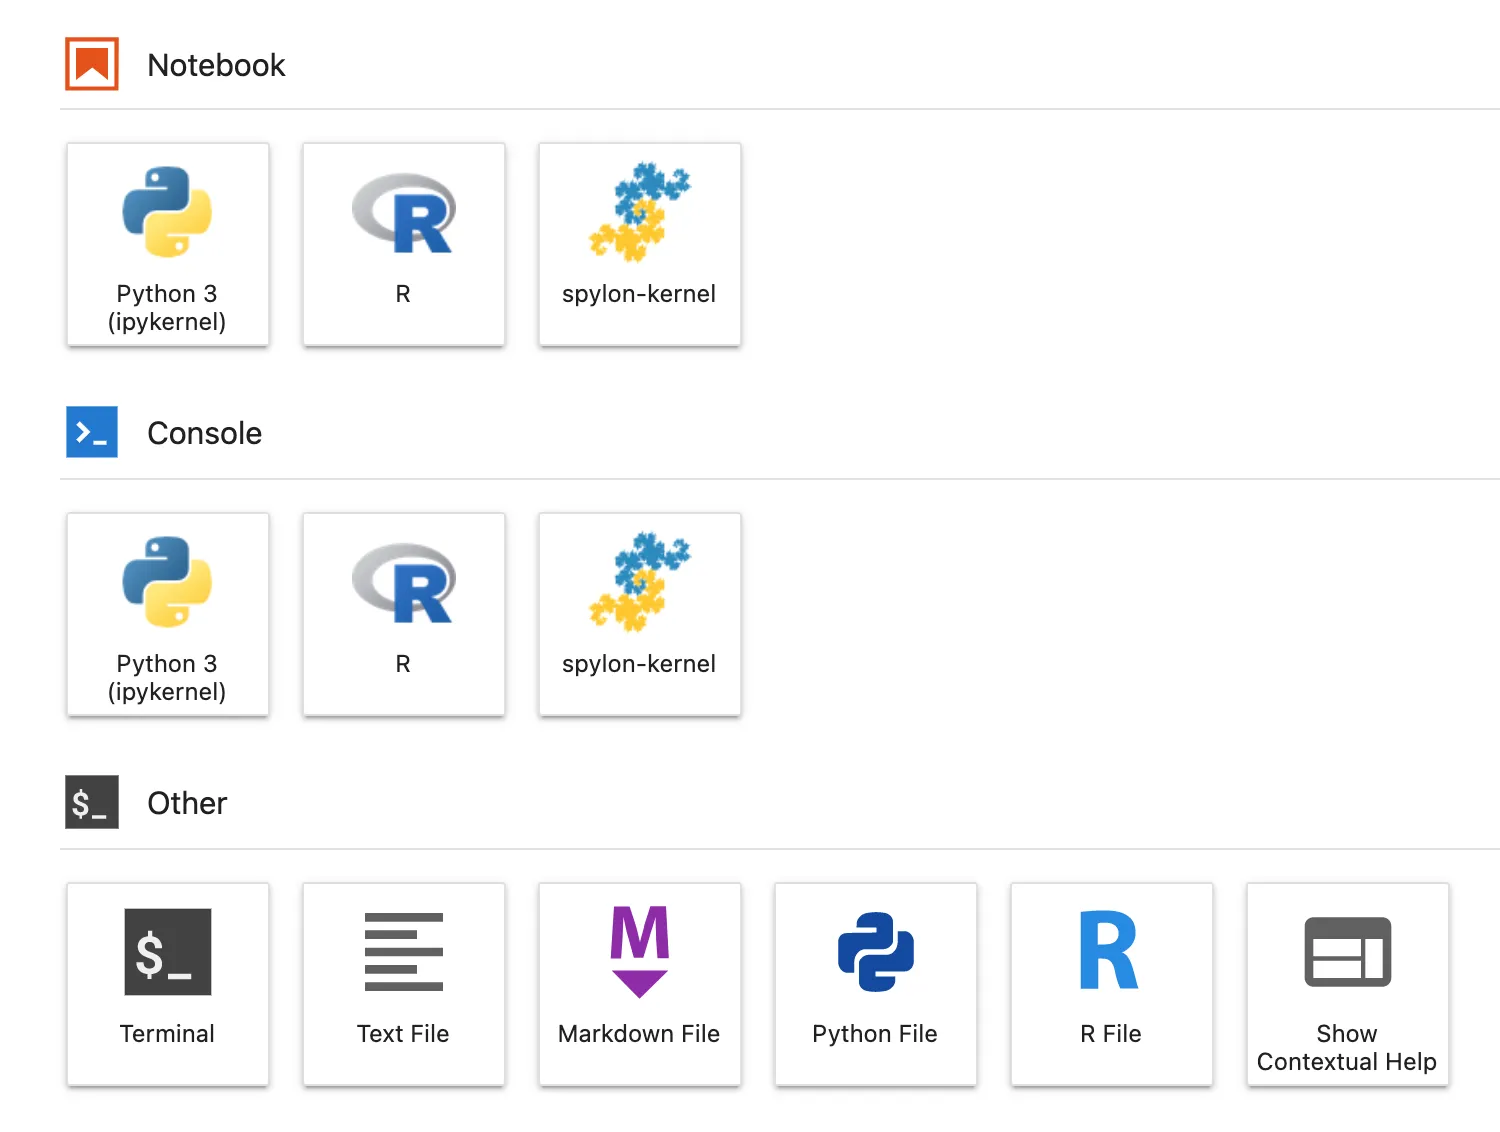
If you use the jupyter/all-spark-notebook you’ll be able to use the R language and spylon (scala).
docker run -e JUPYTER_ENABLE_LAB=yes -p 8888:8888 jupyter/all-spark-notebookOnce started, you’ll see that you have access to those other languages:
Jupyter in data science
Jupyter is used a lot by data scientists. Python has a very large ecosystem of data manipulation libraries and the all-spark-notebook comes with quite a few.
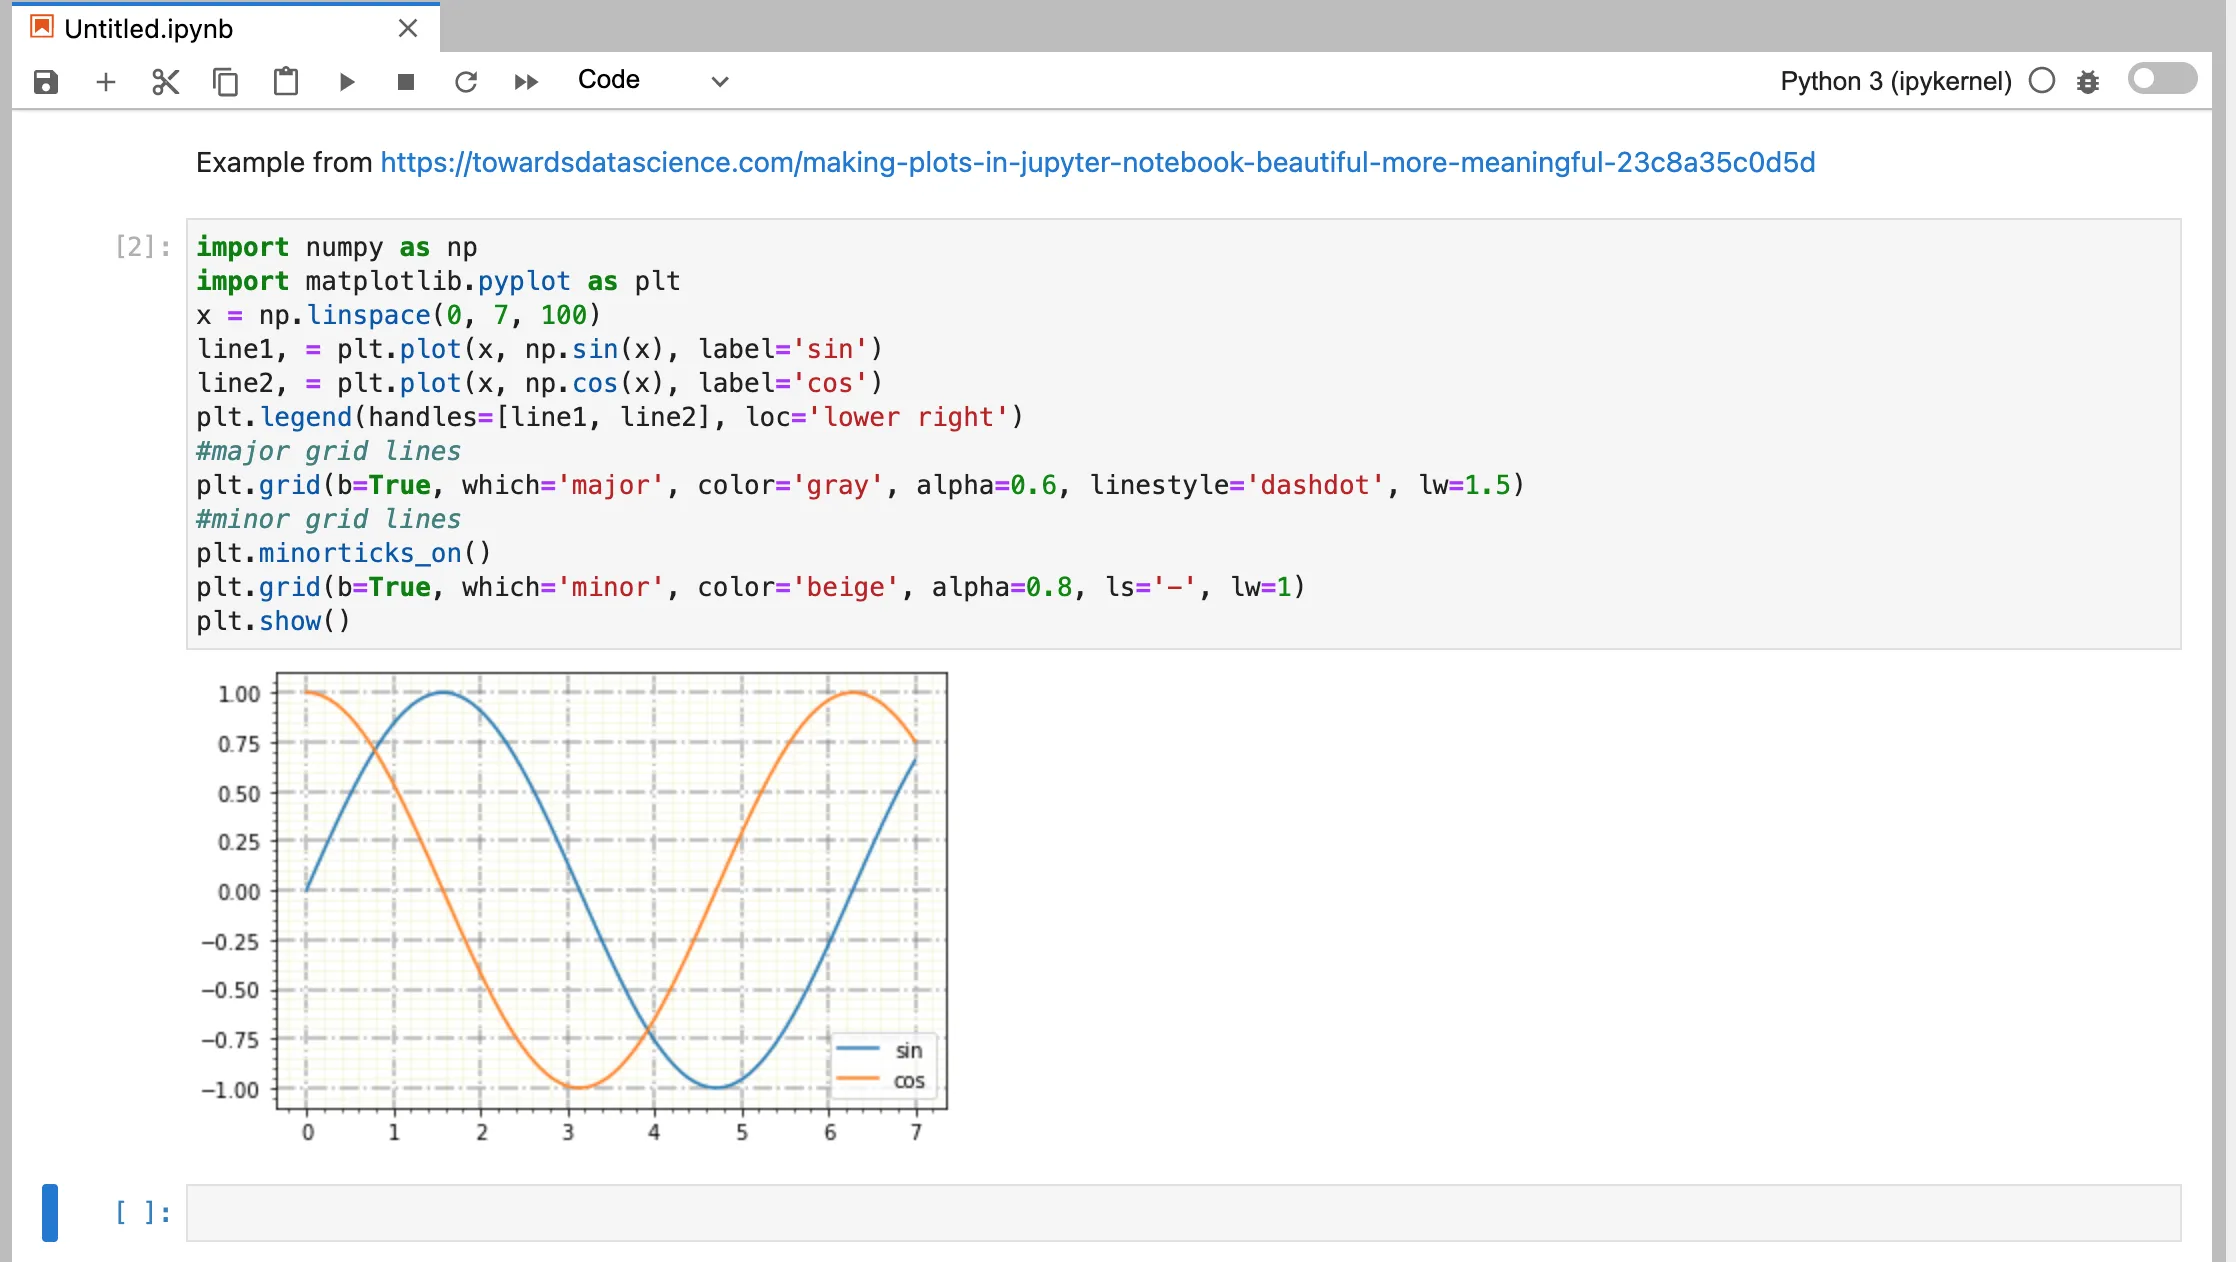
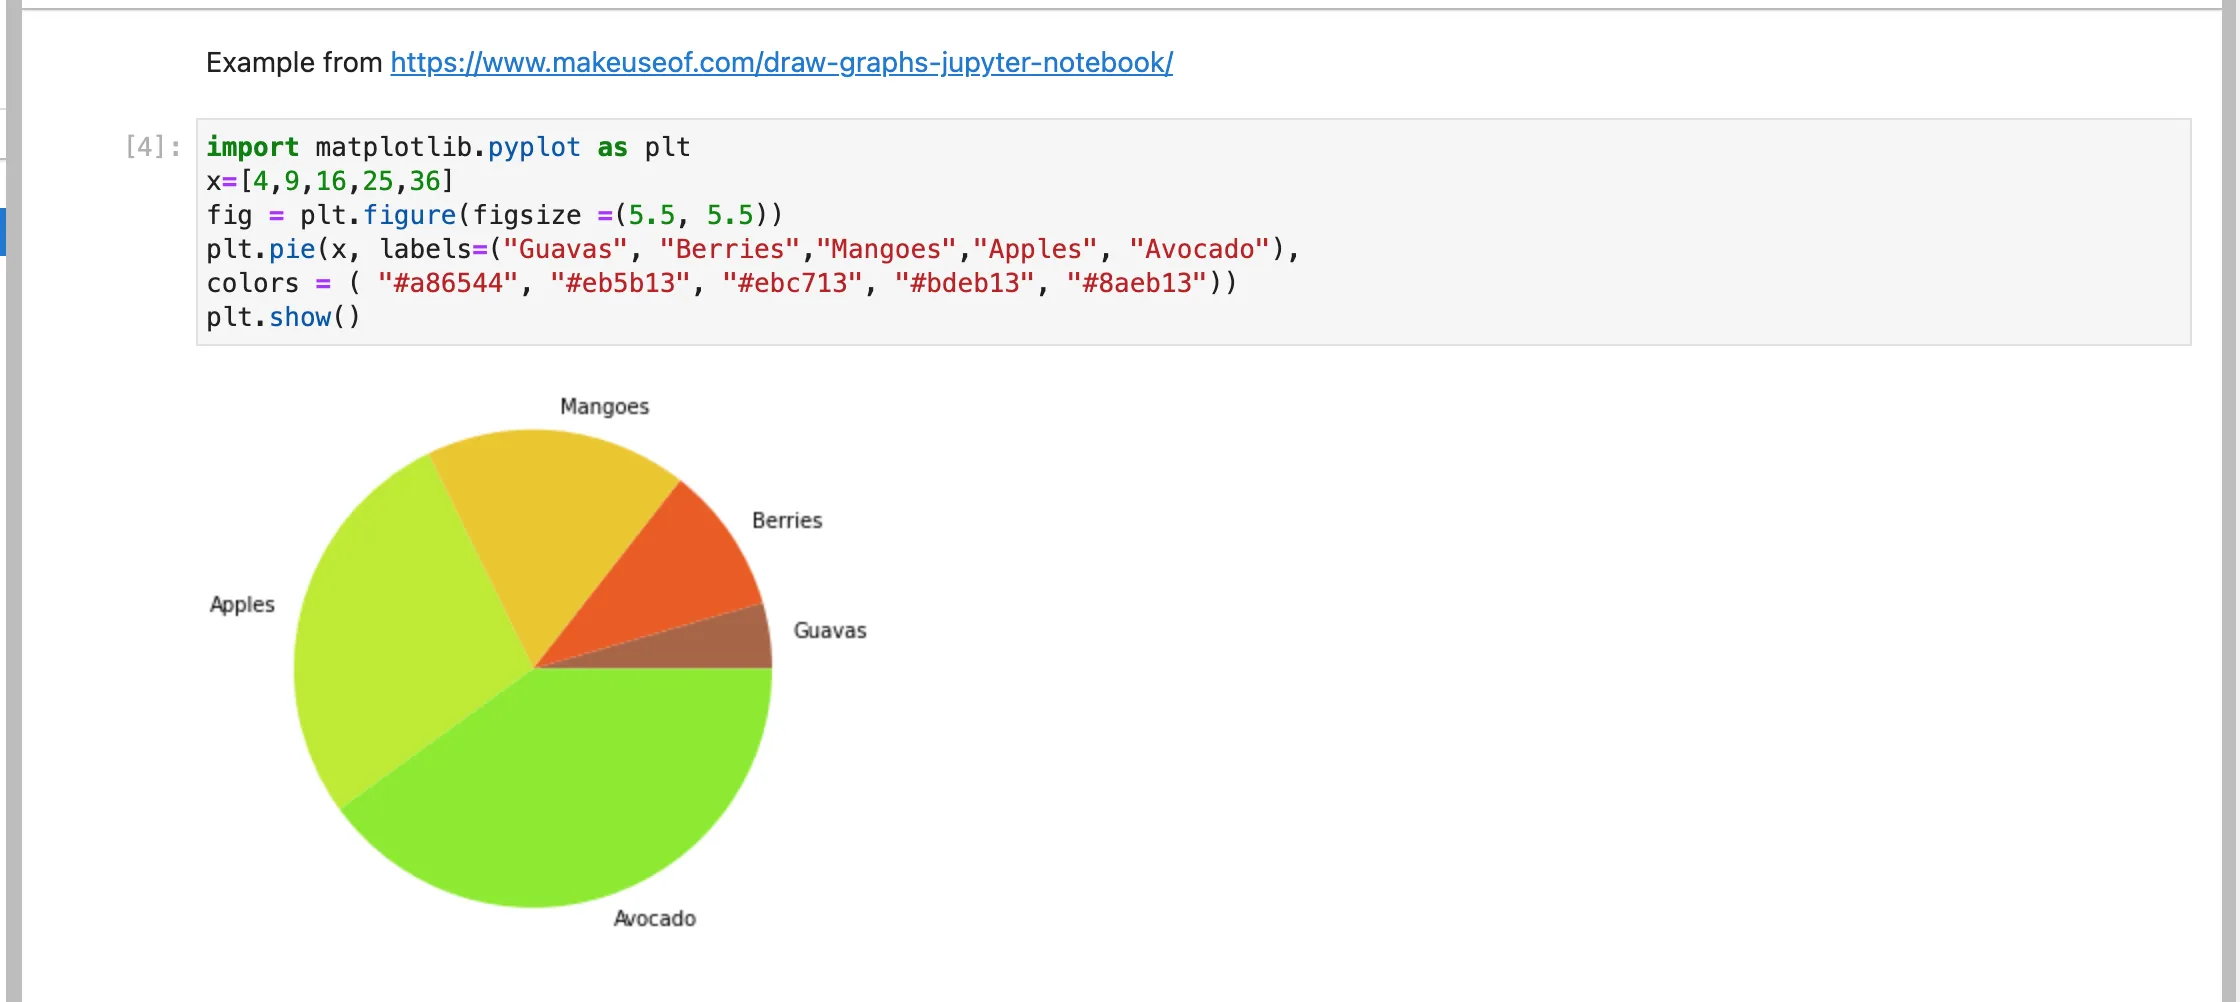
Another nice feature with Jupyter is that it makes it easy to render the data directly in the browser.
I took some examples from https://towardsdatascience.com/making-plots-in-jupyter-notebook-beautiful-more-meaningful-23c8a35c0d5d and here is the rendering:
 or another example from: https://www.makeuseof.com/draw-graphs-jupyter-notebook/
File persistence
The issue with the above setup is that any document you write are persisted inside the docker file system.
If you want to keep around your Jupyter documents, that’s not very convenient.
The good news is that docker has a very convenient way to solve that: docker volumes.
When you check the file explorer in JupyterLab, you see that the home directory is: /home/jovyan
The command to use a volume is:
docker run -e JUPYTER_ENABLE_LAB=yes -p 8888:8888 -v "${PWD}":/home/jovyan/work jupyter/all-spark-notebookNothings changes in the interface.
 But this time, when you stop the docker container, the files that you have been edited in Jupyter are persisted on your disk:
➜ jupyter ls -ltotal 16-rw-r--r-- 1 pcarion staff 940 Oct 16 16:45 Test-persistence.ipynb-rw-r--r-- 1 pcarion staff 616 Oct 16 16:45 Untitled.ipynb➜ jupyter grep persist Test-persistence.ipynb "Can you persist me?\n" "print(\"Can you persist me?\")"Credits
Thank you to my my daughter who introduced me to Jupyter by showing me how the biologists in her labs were using that tool to process and present data.