Introduction
NFT are all the craze, with 25x25 Apes images worth 10s of millions or a collage sold for $69 Millions at Christie’s.
The goal in this document is to programmatically build, deploy and mint a NFT on a test Ethereum blockchain and to view it on OpenSea.
You can also create your own NFT using a web interface on specialized trading platforms like OpenSea or Rarible.
It will be 100 times easier than the programmatic way described here.
But…
If you really want to know how the sausage is being made, you need to put your hands in the code.
At the end of the journey, you’ll have your very own NFT on the Testnets OpenSea.

NFT what?
There are 2 major standards to create a NFT: ERC-721 or ERC-1155.
ERC-721 is simpler than ERC-1155 and the differences are described here.
Let’s start by the end and show the code to develop my ERC-721 token:
pragma solidity ^0.8.9;

// SPDX-License-Identifier: BSD-3-Clause

import "@openzeppelin/contracts/token/ERC721/presets/ERC721PresetMinterPauserAutoId.sol";

contract MyCryptoCharlotte is ERC721PresetMinterPauserAutoId {
    constructor(string memory baseTokenURI)
      ERC721PresetMinterPauserAutoId("NftCharlotte", "CHA", baseTokenURI) {
        // Nothing
    }
}
That’s it.
That’s all that is needed.
There is a little bit of code to be developed to build/deploy/mint the token, but the token itself is only in those 10 lines of code.
The code for this NFT is available on github at https://github.com/pcarion/nftcharlotte
Those 10 lines of code expose the main ingredients needed to build, deploy and mint a NFT.
Let’s review the code block by block.
Smart contract programming language: solidity
pragma solidity ^0.8.9;
The first line of the file tells us that the file is written in the language solidity.
The blockchain Ethereum is the most used blockchain to deploy NFTs because it was one of the first one to support “programmable contracts”
Instead of just storing a crypto money like Bitcoin, Ethereum allows to store programs that are ran and stored on that blockchain.
Those programs are called smart contracts.
Those smart contracts are what makes possible NFTs, Defi , Daos or all those 3 letters acronyms that popup in the crypto news every day.
Solidity is the most popular language to program those smart contracts.
I won’t explain how to install the development environment as there are a lot of documents describing just that. Like this one.
I used HardHat to develop my NFT.
The setup is very similar to a javascript/typescript project and uses the same tools (nodejs/npm).
You can start with an empty project:Steps
➜ nftcharlotte git:(main) ✗ npx hardhat
888 888 888 888 888
888 888 888 888 888
888 888 888 888 888
8888888888 8888b. 888d888 .d88888 88888b. 8888b. 888888
888 888 "88b 888P" d88" 888 888 "88b "88b 888
888 888 .d888888 888 888 888 888 888 .d888888 888
888 888 888 888 888 Y88b 888 888 888 888 888 Y88b.
888 888 "Y888888 888 "Y88888 888 888 "Y888888 "Y888
👷 Welcome to Hardhat v2.8.4 👷
✔ What do you want to do? · Create an empty hardhat.config.js
✨ Config file created ✨
Most smart contracts are open source
// SPDX-License-Identifier: BSD-3-Clause
Most, if not all, the contracts you find on Ethereum are open source. Or at least, you have access to the code
This is not for ideological reasons but that’s almost required by the ecosystem.
A smart contract is an entity on the blockchain that can send and receive money (Ether).
So it is important for a user to know the mechanisms (the program) used to process this money before sending money to that contract.
Openzeppelin to the rescue
import "@openzeppelin/contracts/..."
The syntax of Solidity is very simple and the primitive offered by the runtime are foreign at first but still pretty easy to grasp.
On top of that, because the code will be ran on a lot of different machines during the mining process, the functions you have to implement have to be pure meaning that they can’t have side effects.
That contributes to make the code easier to write, and more importantly read.
But still, writing a contract is not to be taken slightly, for 2 very specific reasons:
- cost of execution: when a program runs on the blockchain, each instructions cost money (gas). This kind of cost analysis is a very specific concern to the blockchain and not in regular programs.
- security: the blockchain, because it involves money exchange, is a very hostile environment. There are regular exploits like this $320 million hack.
In short, you don’t really want to write a contract on your own.
Even if you decide to write your own contract, you’ll have to make sure that it is fully tested and audited.
This makes the development of a contract pretty expensive.
The good news is that there is a rich ecosystem, with actors like OpenZeppelin that offer ready to use contracts.
And those contracts are easy to integrate:
npm install --save-dev @openzeppelin/contracts
That’s the reason the code I personally wrote for my NFT is only one line.
ERC721PresetMinterPauserAutoId
import "@openzeppelin/contracts/token/ERC721/presets/ERC721PresetMinterPauserAutoId.sol";
That name is a mouthful but that contract gives us for free what we need for our NFT.
As the documentation of this contract says, this pre-made contract gives us:
- an ERC-721 token
- the ability for holders to burn (destroy) their tokens
- a minter role that allows for token minting (creation)
- a pauser role that allows to stop all token transfers
- token ID and URI autogeneration
- the account that deploys the contract will be granted the minter and pauser roles, as well as the default admin role, which will let it grant both minter and pauser roles to other accounts.
That’s more than enough for what we need for my toy NFT.
All those features are available with only 1 line of code that describe fully the NFT:
contract MyCryptoCharlotte is ERC721PresetMinterPauserAutoId {
    constructor(string memory baseTokenURI)
      ERC721PresetMinterPauserAutoId("NftCharlotte", "CHA", baseTokenURI) {
        // Nothing
    }
}
There are 3 parameters for my NFT here:
NftCharlotte: the name of the NFT. That’s an internal name to identify the contract.CHA: the symbol of the NFT. Think Stock Ticker.baseTokenURI: the base URL set at deployment time.
That baseTokenURI is used to actually store the asset of the NFT itself.
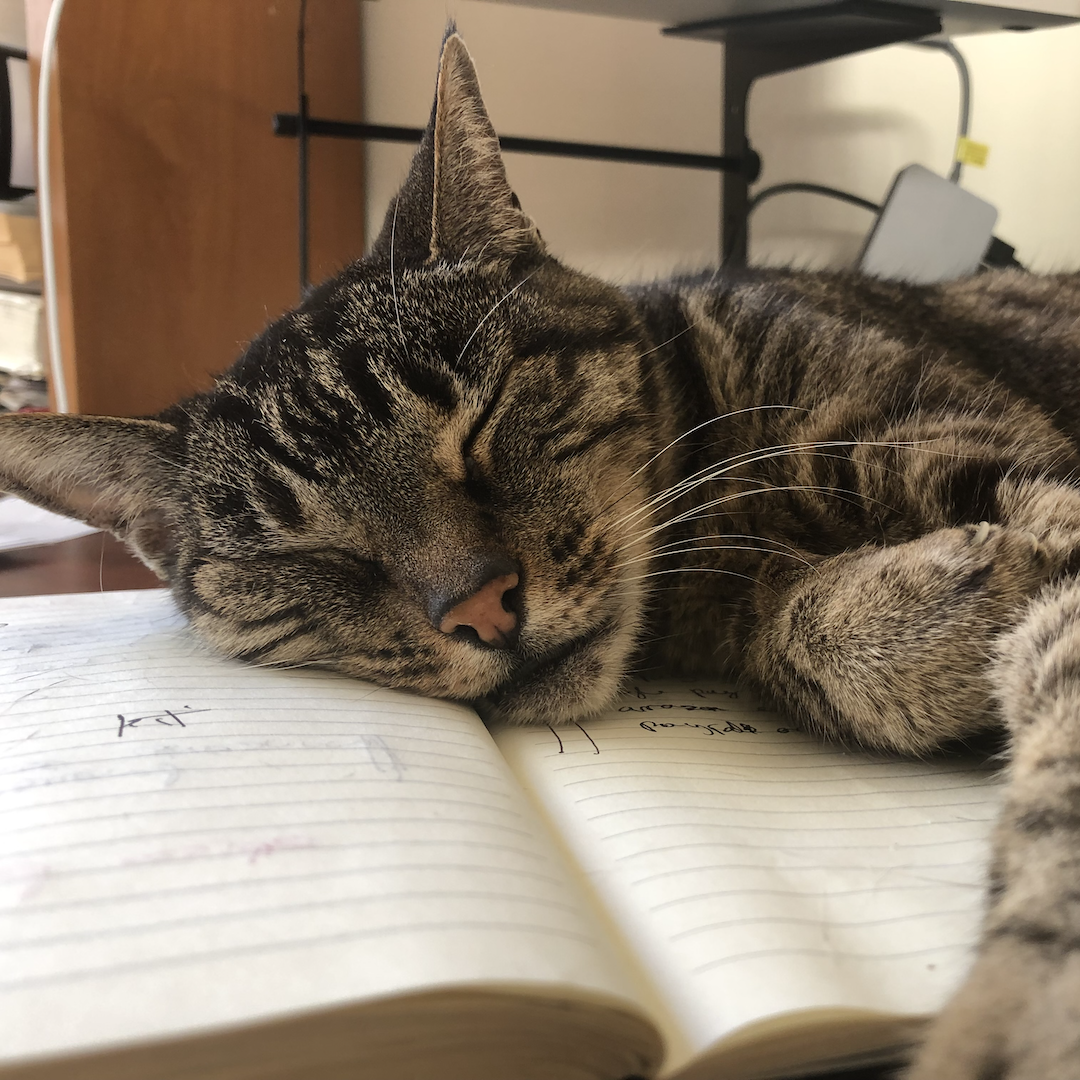
At the end of the day, a NFT is just an image right?
So we need 2 things:
- a way to access the image (the URL of that image)
- some meta information about that image: author, description, publishing date etc…
A set of JSON files will fully describe those NFTs.
An example of JSON file for my Charlotte NFT:
{
    "description": "Charlotte",
    "external_url": "https://gateway.pinata.cloud/ipfs/Qma83zrXmKE1bkUMPKTLMv8gXaYfqLnfcMTTkZVPWYSinV/charlotte-00.png",
    "image": "https://gateway.pinata.cloud/ipfs/Qma83zrXmKE1bkUMPKTLMv8gXaYfqLnfcMTTkZVPWYSinV/charlotte-00.png",
    "name": "Charlotte #1",
    "attributes": [
        {
            "trait_type": "Author",
            "value": "Pierre Carion"
      },
      {
            "trait_type": "Camera",
            "value": "iPhone 13"
      },
      {
            "trait_type": "Resolution",
            "value": "1080px x 1080 px"
      },
      {
          "display_type": "date",
          "trait_type": "Published",
          "value": 1645297855
      }]}
The EIP-721 document describes formally that JSON file.
The burning question is then.. where to we store those JSON files?
That’s where the baseTokenURI and the AutoId feature of the contract come into play.
Let’s say that baseTokenURI is set to https://my.storage.com/nft
Each time you mint (create) a token, the JSON for that token will be at: https://my.storage.com/nft/0 then https://my.storage.com/nft/1, then https://my.storage.com/nft/2 etc
This is done for use by the ERC721PresetMinterPauserAutoId contract:
- in the minting function of the OpenZeppelin contract and id is automatically incremented each time
- this id is appended to the base URI that you provide at deployment time
Storage of NFT assets
The blockchain would be a very expensive way to store raw data, like images or any other static asset.
Except for very limited use cases, the NFT assets are stored off-chain.
Without being too philosophical about the decentralized nature of the blockchain, this a weakness of the NFT model
A NFT is split in 2 parts:
- the contract itself: it is safely stored in the blockchain.
- the associated assets: they are more or less locked in a more centralized environment.
This article from OpenSea describes the different options and challenges to address that conundrum.
For my toy NFT, I decided to store those assets in IPFS… that stands for InterPlanetary File System. At least the name is future proof.
Pinata is a free service that allows you to upload files to IPFS.
Keep in mind that IPFS is a public network so be careful what you store there.
Pinata storage
The NFT assets are comprised of 2 parts:
- the raw files : .png. .jpegs, .avi or any file you want to wrap in an NFT
- the json files containing the meta information about a specific NFT
This step requires a little bit of preparation to make it easy to move forward with the NFT deployment.
Create 2 directories on your disk locally:
- an
imagedirectory to store the images (I didn’t store them in the github repo because of the size of the images, but they are inassets/imageson my local disk - a
metadirectory to store the meta information in JSON files (directoryassets/meta, stored in gitbub), and the files there are0,1,2etc… no extension and starting at0to be compliant with theautomatic idfeature of the contract described in a previous section.
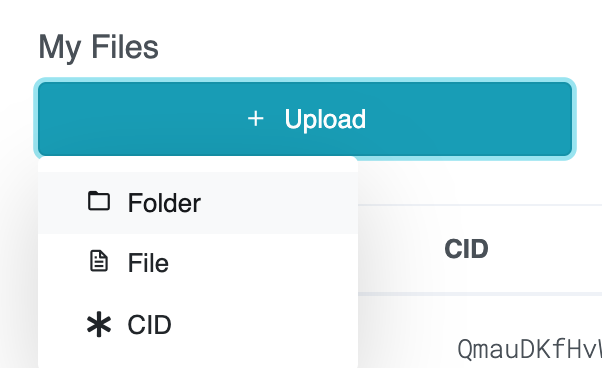
Once those files are ready, you can upload them in Pinata in 2 steps: it is important to upload those directories, not file by file using that menu:
You upload first your image directories in pinata.
Once done, you can then see your images in IPFS/Pinata:
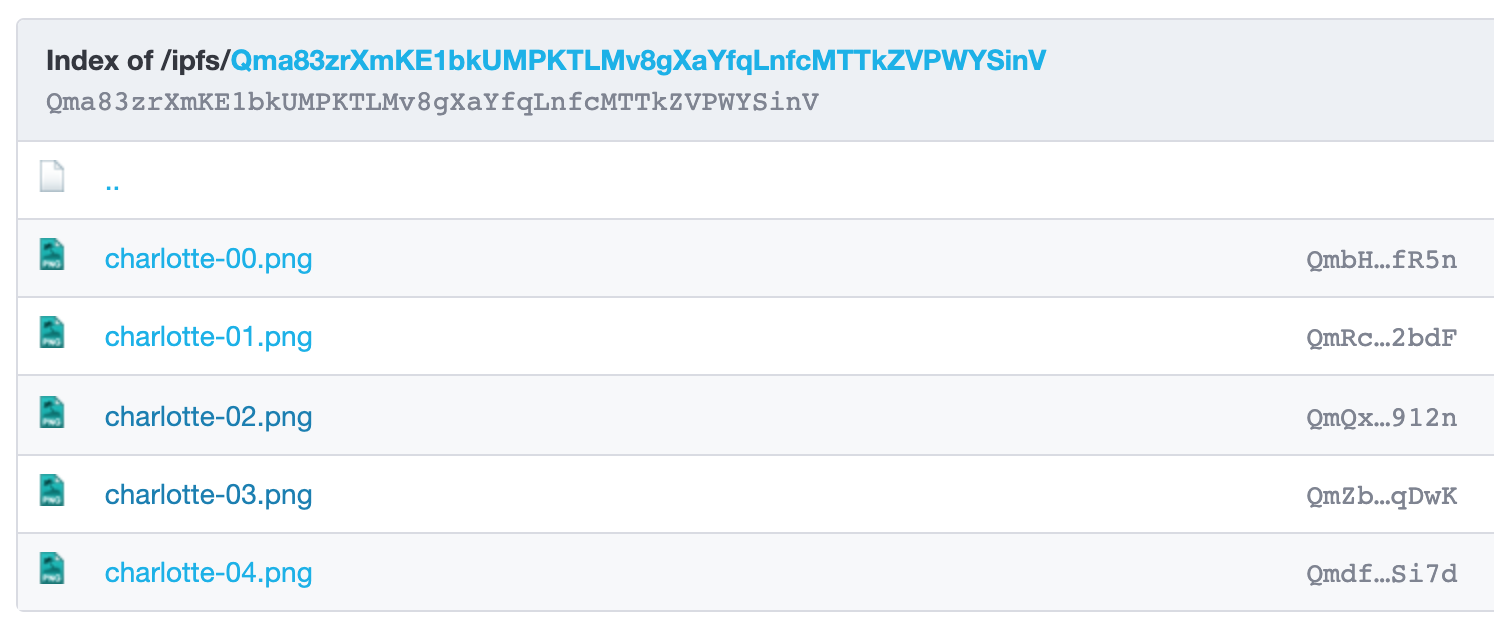
Each image has its own URL then like: https://gateway.pinata.cloud/ipfs/Qma83zrXmKE1bkUMPKTLMv8gXaYfqLnfcMTTkZVPWYSinV/charlotte-00.png
IMPORTANT: Now that you have those URLs you must update your JSON files to set the proper image URLs in the different json files, in the properties external_url and image.
Once those JSON files are updated, you can upload your meta directory to Pinata.
For me that gave me a setup like this one in Pinata:
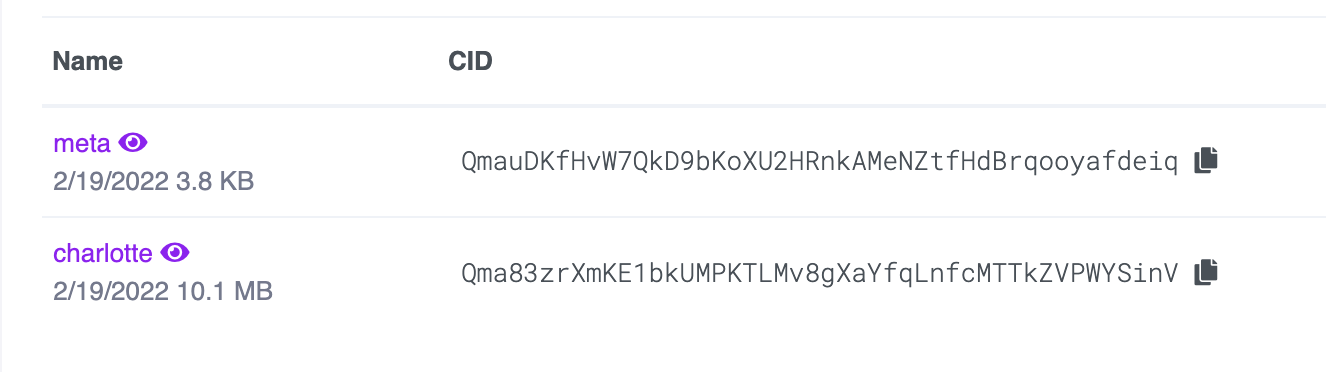
The meta directory contains the JSON files with the naming convention described above:
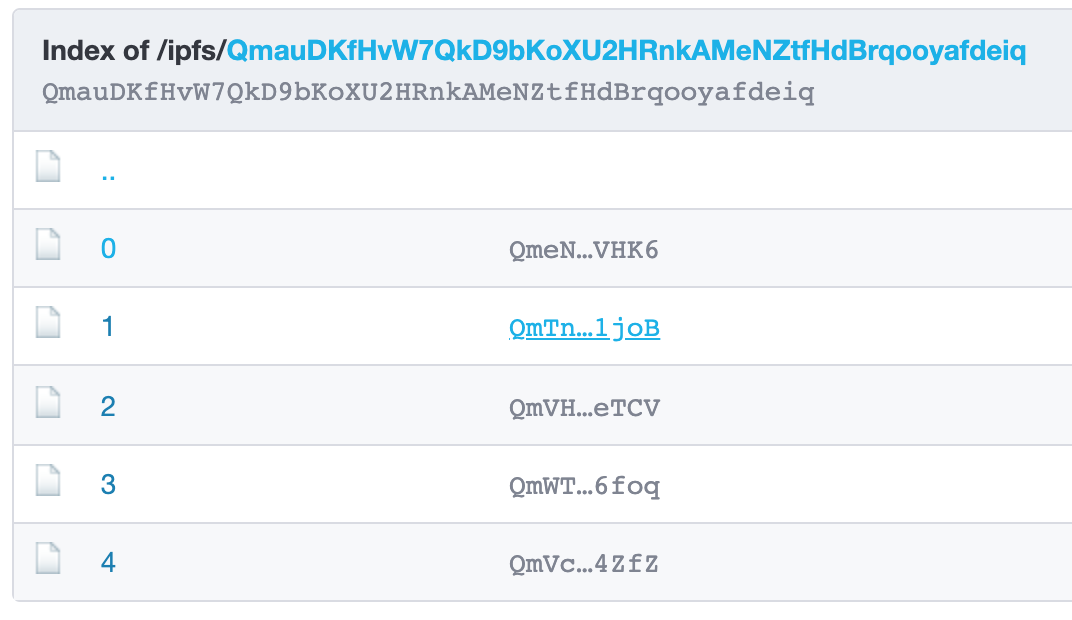
Each of those files has an URL like:
https://gateway.pinata.cloud/ipfs/QmauDKfHvW7QkD9bKoXU2HRnkAMeNZtfHdBrqooyafdeiq/0
https://gateway.pinata.cloud/ipfs/QmauDKfHvW7QkD9bKoXU2HRnkAMeNZtfHdBrqooyafdeiq/1
Now you have the baseURI value that we talked about previously.
The contract will need that base URL at deployment time:
https://gateway.pinata.cloud/ipfs/QmauDKfHvW7QkD9bKoXU2HRnkAMeNZtfHdBrqooyafdeiq/[`https://gateway.pinata.cloud/ipfs/QmauDKfHvW7QkD9bKoXU2HRnkAMeNZtfHdBrqooyafdeiq/`](https://gateway.pinata.cloud/ipfs/QmauDKfHvW7QkD9bKoXU2HRnkAMeNZtfHdBrqooyafdeiq/1)
Contract deployment
The contract deployment script is here: https://github.com/pcarion/nftcharlotte/blob/main/scripts/deploy.js
This script uses environment variables, using the very handy direnv tool.
You don’t want to store your local keys, URLs etc in your code.
The PINATA_META_BASEURL for instance contains the base URL obtained in the previous step.
export PINATA_META_BASEURL="https://gateway.pinata.cloud/ipfs/QmauDKfHvW7QkD9bKoXU2HRnkAMeNZtfHdBrqooyafdeiq/"
The hardhat toolset comes with a test toolchain that runs locally on your laptop.
The local toolchain makes the development and test super fast.
The problem is that, if you want to make your NFT available to the world, this local blockchain won’t make it.
The public ethereum is the way to go for a real NFT but don’t make sense for a toy NFT: the cost of deployment (called gas) are prohibitive for a test project.
The obvious solution is to use a test Ethereum blockchain to publish my NFT.
That’s where it becomes a bit more complex, and some would say … tedious.
You need quite a few pieces for that process:
- a Ethereum wallet: that’s how you create an Ethereum address that will be your identity to publish and mint your token on the blockchain
- fake ether: even on a test blockchain, you need Ether to deploy your contract
- a mechanism to interact with the blockchain to deploy and then mint your NFT. We will be using alchemy for that
If all goes well, you will be able to share with the world your NFT on OpenSea. A test network OpenSea… but still.
A Crypto Wallet
The wallet is still the Achilles heel of the web3 world: this is a required component that you need to have to interact with a blockchain but the user experience there can be overwhelming for people new to the crypto world.
I suggest to use Metamask.
Metamask is a browser extension that allows you to create a new Blockchain address and interact with different blockchains.
You can follow the instructions here or that video… and be ready to pull your hair a little bit.
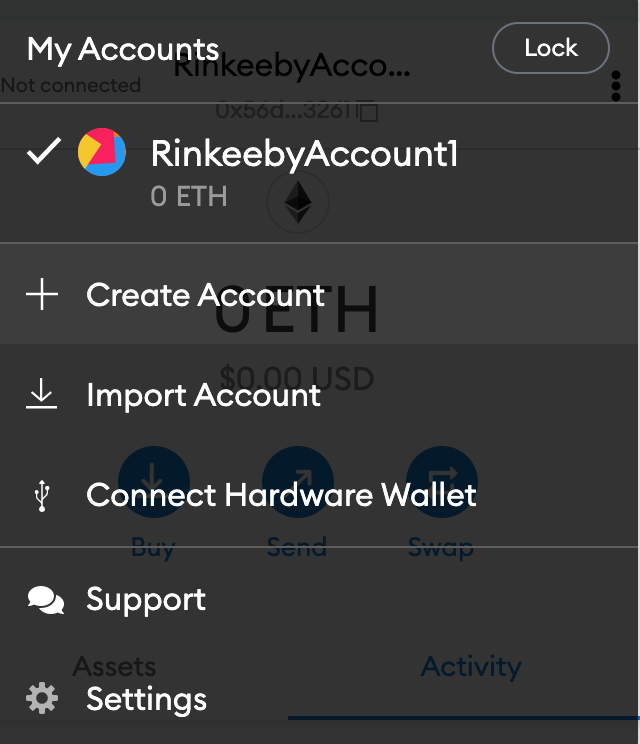
Once you have Metamask installed, go ahead and create a new Account that you can use specifically for that toy NFT.
IMPORTANT: don’t reuse an existing account, especially if it is an account with real ethers as it is way too easy to do screw up and burn Ethers .
A test blockchain with Ethers
There are a few test blockchain (called testnets) available for you to deploy your contract.
Each of those testnets have a “faucet” which is a mechanism used to get test ethers (for free).
Some of those testnets are:
That was not as easy as it could be.
Far from it.
I tried all those testnets, and the faucets were either out of funds (I guess there are hoarders for those monopoly ethers) or the faucet was just not working.
I went with the Rinkeby testnet but were never able to get test ether using their faucet.
I always got that error message:

I found on reddit a website that was sending test ether here.
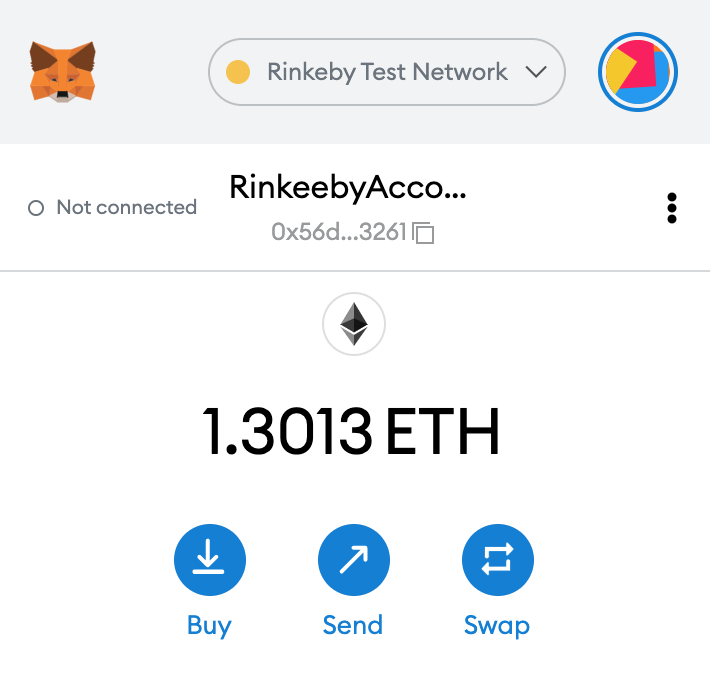
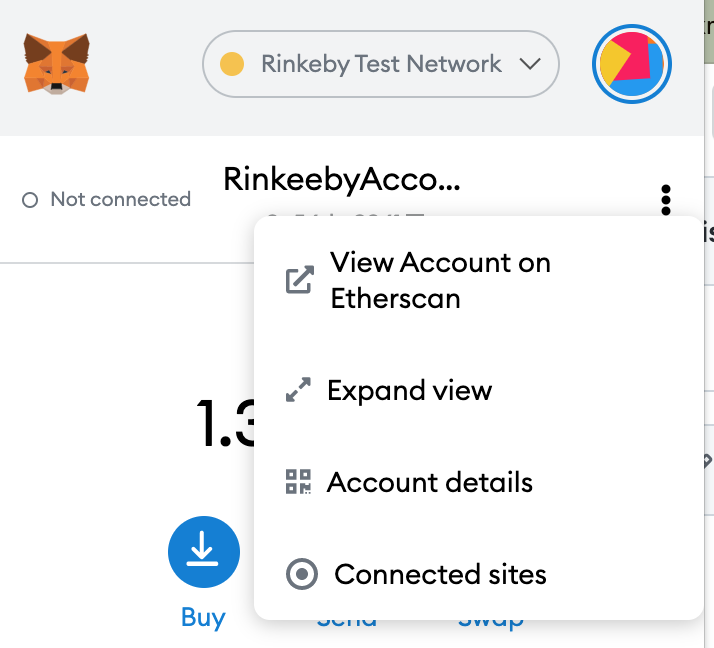
Once you have transferred those fake ethers to your rinkeby testnet, they should appear in your Metamask:
Ethereum gateway
To deploy and interact with your contract (eg. to mint), you need a gateway service.
There are quite a few of them and went with alchemy: it’s free for a simple use like this one and easy to setup.
You just need to create an app on the rinkeby testnet:
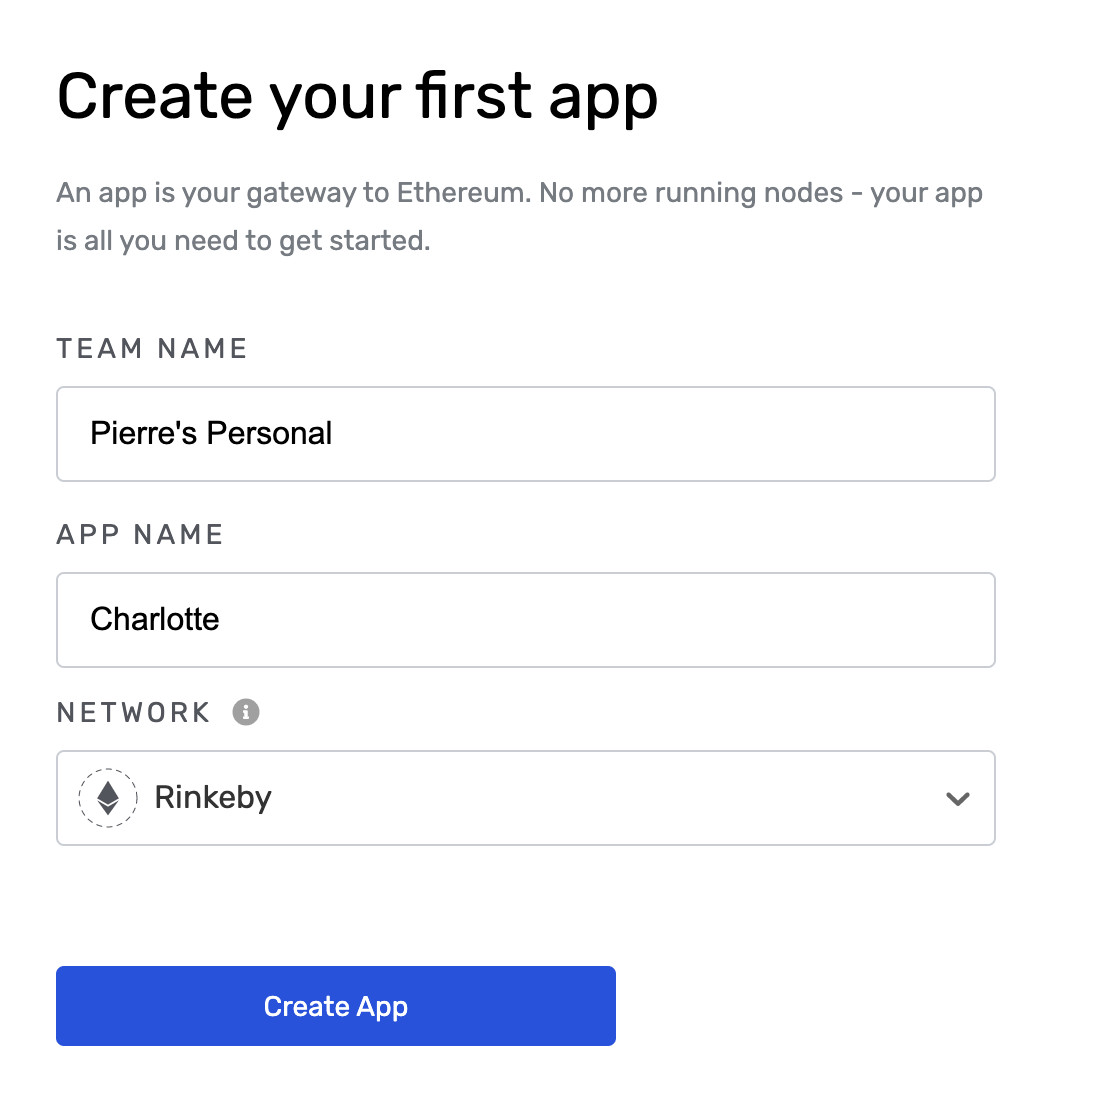
Once done, you will have access to an API key that you can use with Hardhat
Contract deployment
Hardhat makes that step pretty easy for you.
You need first to compile the contract:
nftcharlotte git:(main) ✗ npx hardhat compile
Downloading compiler 0.8.9
Compiling 10 files with 0.8.9
--> contracts/MyCryptoCharlotte.sol

Solidity compilation finished successfully
If you have unit tests, you can run them:
➜  nftcharlotte git:(main) ✗ npx hardhat test
Compiling 1 file with 0.8.9
Solidity compilation finished successfully


  MyCryptoCharlotte
name MyCryptoCharlotte
symbol CHA
msg.sender 0xf39fd6e51aad88f6f4ce6ab8827279cfffb92266
    ✓ Should return the right name and symbol (966ms)
You can also to a test deployment on your local test blockchain:
➜  nftcharlotte git:(main) ✗ npx hardhat run scripts/deploy.js
Compiling 1 file with 0.8.9
Solidity compilation finished successfully
MyCryptoCharlotte deployed to: 0x5FbDB2315678afecb367f032d93F642f64180aa3
In order to deploy on rinkeby, you need to add a network in your hardhat.config.js file:
rinkeby: {
  url: rinkebyUrl,
  accounts: [privateKey1]
}
Where:
- ringebyUrl is the alchemy URL that you’ll find in your dashboard for the application you created
- accounts: where you put the private key (NOT the public key) that you created in metamask.
You get the private key in the “Account Details” in metamask:
and export private key:
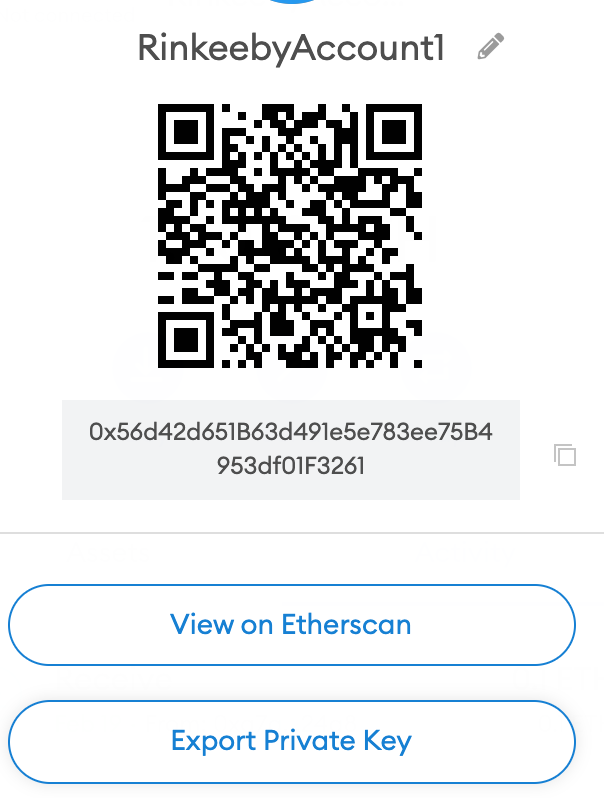
IMPORTANT: needless to say that this private key has to be kept secret, right?
Finally, you tie everything together in a deployment script:
PINATA_META_BASEURL=process.env['PINATA_META_BASEURL']

async function main() {
  const [deployer] = await ethers.getSigners(); //get the account to deploy the contract
  console.log("Deploying contracts with the account:", deployer.address);


  const MyCryptoCharlotte = await hre.ethers.getContractFactory("MyCryptoCharlotte");
  const myCryptoCharlotte = await MyCryptoCharlotte.deploy(PINATA_META_BASEURL);

  await myCryptoCharlotte.deployed();

  console.log("MyCryptoCharlotte deployed to:", myCryptoCharlotte.address);
}

main()
  .then(() => process.exit(0))
  .catch((error) => {
    console.error(error);
    process.exit(1);
  });
The PINATA_META_BASEURL is the base URL we described in a previous section and is passed as the sole parameter of your contract:
contract MyCryptoCharlotte is ERC721PresetMinterPauserAutoId {
    constructor(string memory baseTokenURI) ERC721PresetMinterPauserAutoId("NftCharlotte", "CHA", baseTokenURI) {
        // Nothing
    }
}
Finally you can deploy on rinkeby, through alchemy:
➜  nftcharlotte git:(main) ✗ npx hardhat run scripts/deploy.js  --network rinkeby
Deploying contracts with the account: 0x56d42d651B63d491e5e783ee75B4953df01F3261
MyCryptoCharlotte deployed to: 0x574E5E835c19f34E8cB263B12f001ae131Ff797a
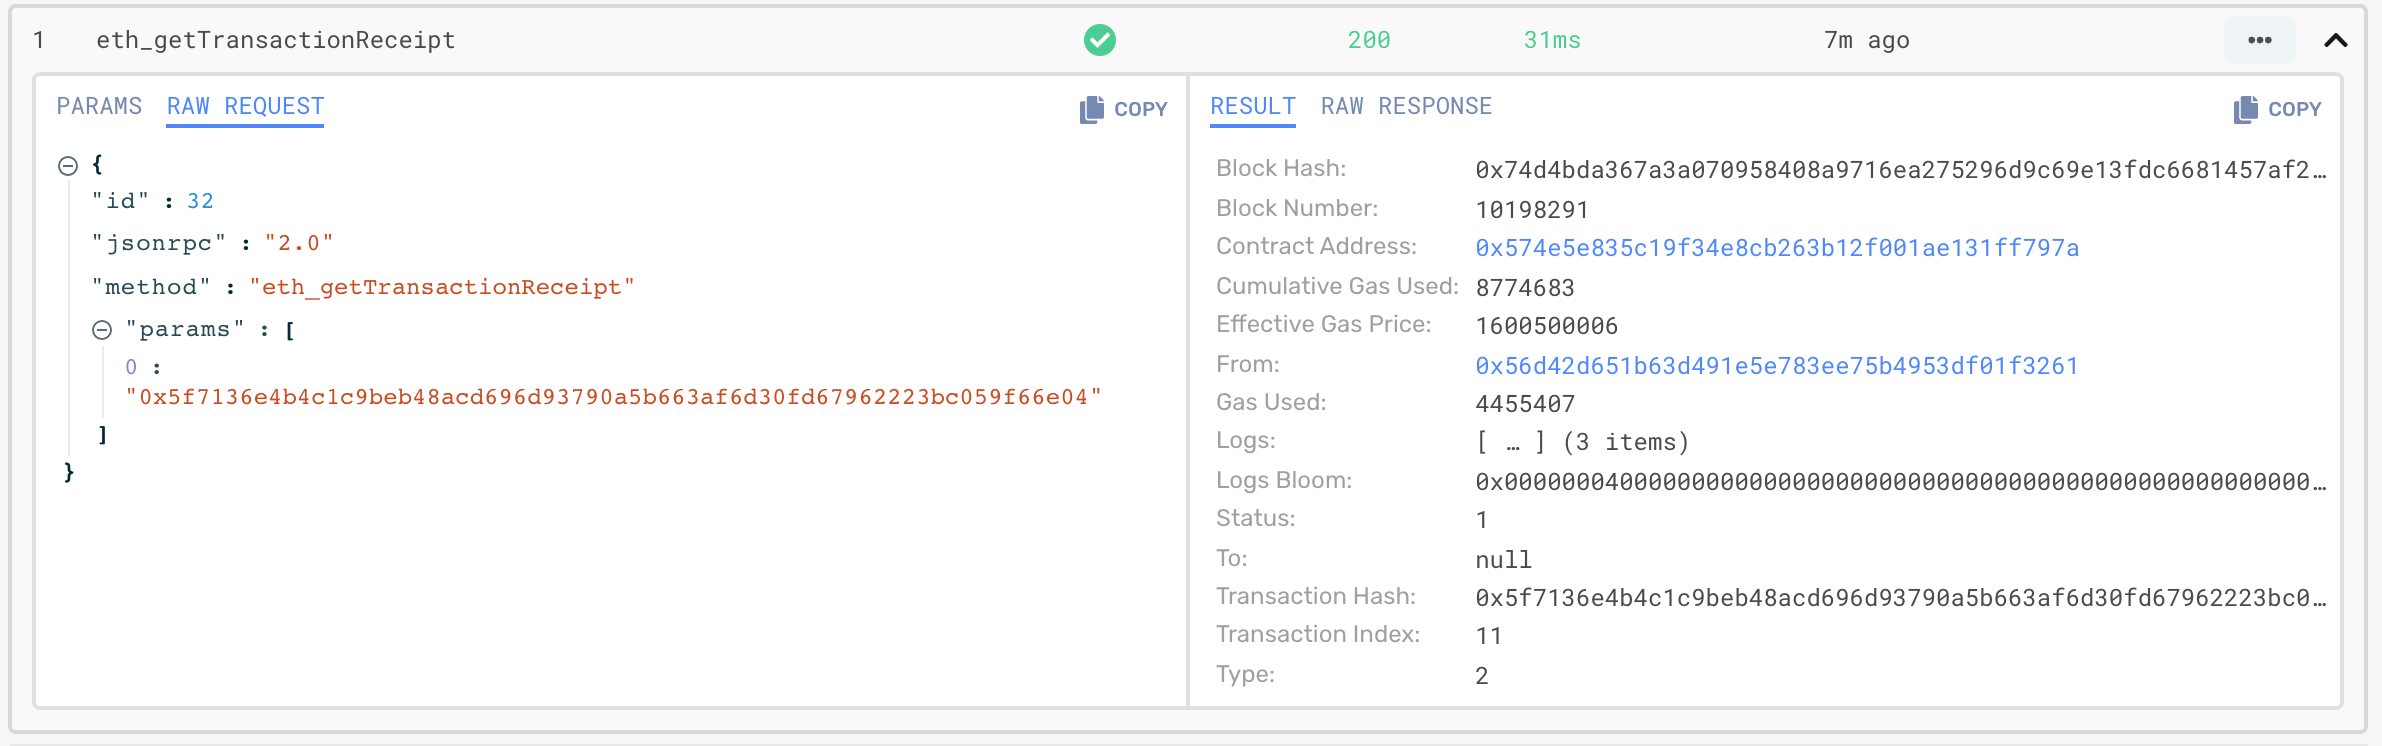
in the Alchemy dashboard, you can see your transaction:
Minting
Minting is the process by which you actually print new tokens.
This is done by invoking the method mint() on your contract.
Only yourself (deployer), or an address that you give the MINTER role can call that function.
A little bit more complex, but still pretty basic, the minting script is:
const CHARLOTTE_CONTRACT_ADDRESS=process.env['CHARLOTTE_CONTRACT_ADDRESS'];
const RINKEBY_PRIVATEKEY_1=process.env['RINKEBY_PRIVATEKEY_1'];

const NFT = require('../artifacts/contracts/MyCryptoCharlotte.sol/MyCryptoCharlotte.json');

async function main() {
  const [minter] = await ethers.getSigners(); //get the account to mint the contract
  console.log("Minting contracts with the account:", minter.address);

  const nftContract = new ethers.Contract(
    CHARLOTTE_CONTRACT_ADDRESS,
    NFT.abi,
    minter
  )
  const nftTx = await nftContract.mint(minter.address)
	console.log('Mining....', nftTx)
}

main()
  .then(() => process.exit(0))
  .catch((error) => {
    console.error(error);
    process.exit(1);
  });
for that script to run, you need 2 environment variables to be set:
CHARLOTTE_CONTRACT_ADDRESS: the address of the contract has reported during the deployment phase (for me that’s574E5...Ff797a)RINKEBY_PRIVATEKEY_1: the private key of your Metamask address
You can then run your minting script:
➜  nftcharlotte git:(main) ✗ npx hardhat run scripts/mint.js  --network rinkeby
Minting contracts with the account: 0x56d42d651B63d491e5e783ee75B4953df01F3261
Mining.... {
  hash: '0xbabf9dc2a2fbb358d29d7a0b883cd8f88f607f91b79fc60c4539997ff22e3ed2',
  type: 2,
  accessList: [],
  blockHash: null,
  blockNumber: null,
  transactionIndex: null,
  confirmations: 0,
  from: '0x56d42d651B63d491e5e783ee75B4953df01F3261',
  gasPrice: BigNumber { value: "1500000012" },
  maxPriorityFeePerGas: BigNumber { value: "1500000000" },
  maxFeePerGas: BigNumber { value: "1500000012" },
  gasLimit: BigNumber { value: "127983" },
  to: '0x574E5E835c19f34E8cB263B12f001ae131Ff797a',
  value: BigNumber { value: "0" },
  nonce: 1,
  data: '0x6a62784200000000000000000000000056d42d651b63d491e5e783ee75b4953df01f3261',
  r: '0xd40e7c91a719ea790f09df958b7af4af483eabd16bb88714de02d13c312da087',
  s: '0x416f141bcc0d059f61998bb1a2a7660f53a2109c433b3e21b8f8889ba2eb8288',
  v: 0,
  creates: null,
  chainId: 4,
  wait: [Function (anonymous)]
}
This will mint the first NFT (tokenId 0) and , as we have 5 images, you can run that script 4 extra times to mint token ids 1,2,3 and finally 4.
Well…
Not so fast.
Literally
You can check the status of a transaction in the rinkeby etherscan website using the hash of the transaction here.
For me, the transaction remained in the state:
“This transaction has been included and will be reflected in a short while”
and stayed in that state for a couple of hours:

I woke up during the night to check its status and it was finally OK:

and then I was finally able to run the other 4 mints.
Finally, the 5 transactions hashes, for the 5 mints, are:
0xbabf9dc2a2fbb358d29d7a0b883cd8f88f607f91b79fc60c4539997ff22e3ed2
0xf1ded7481265d447018071cbd5ce15b7be635680f6af6625cf77311327a9a9e7
0x81859f815430d0375a24ea58a0be962be545e8217e07e413e484cef4918d31d9
0xcafff94cad65f58e347bd27cba77dca5d313ac767bf90696e4fb8fe4fbc59629
0xd083c366114f25cac58cd37973589be6a689c21c7a2c80708a9c84c8e5926685
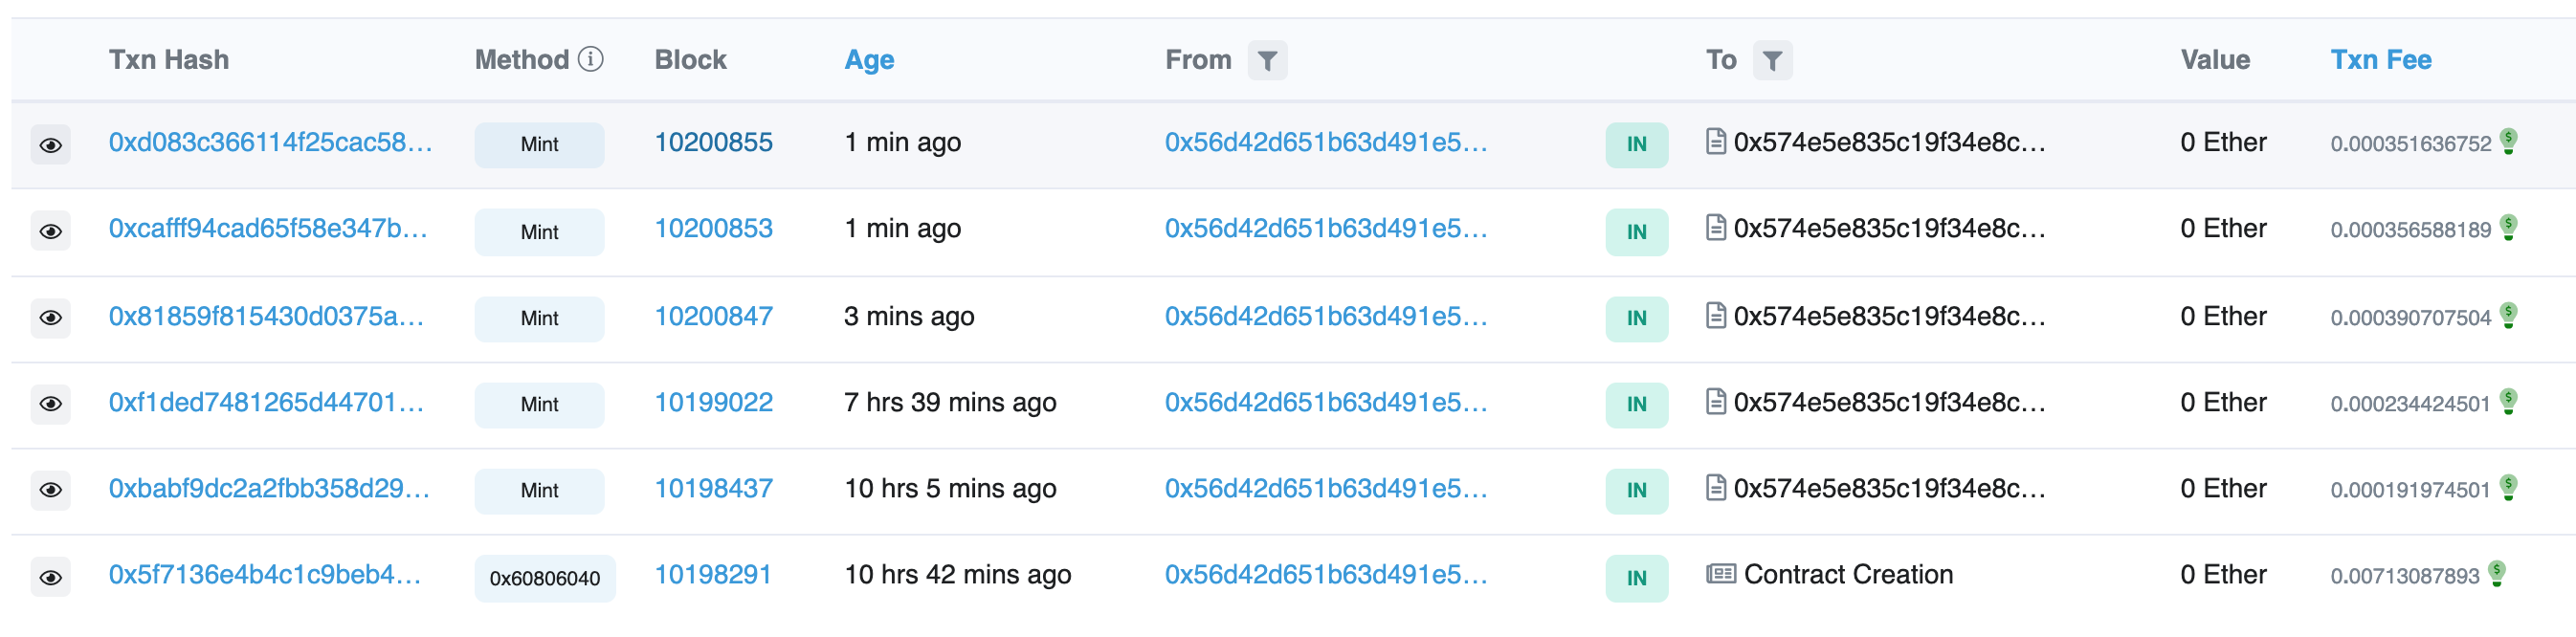
If you enter the contract address in the rinkeby etherscan, you can see those 4 transactions (here) :
OpenSea. Finally
You can see your hard-earned NFT in a special version of the OpenSea website that works with testnets: https://testnets.opensea.io/account
All you have to do is use metamask to link your address in OpenSea and … voilà: https://testnets.opensea.io/collection/nftcharlotte

You can share the links of your 5 NFts to the world with those URLs at:
- https://testnets.opensea.io/assets/0x574e5e835c19f34e8cb263b12f001ae131ff797a/0
- https://testnets.opensea.io/assets/0x574e5e835c19f34e8cb263b12f001ae131ff797a/1
- https://testnets.opensea.io/assets/0x574e5e835c19f34e8cb263b12f001ae131ff797a/2
- https://testnets.opensea.io/assets/0x574e5e835c19f34e8cb263b12f001ae131ff797a/3
- https://testnets.opensea.io/assets/0x574e5e835c19f34e8cb263b12f001ae131ff797a/4
Enjoy!